Personalisation is one of those words that can mean everything or nothing. For most of us it cannot mean a separate course for every student. It can mean a small number of well-chosen changes that make a course fit the people in it. This post gives you four tactics, and a way to keep them manageable.
Learning outcomes
By the end of this post you’ll be able to
- Explain what personalisation means in a course you teach.
- Compare four personalisation tactics by effort and benefit.
- Design one small personalised route for a unit, with one standard for everyone.
What personalisation is and is not
Personalisation means giving students sensible choices over what they do, how they show it, and when they move on, based on what they already know and what they need. The learning outcome stays the same, and so does the standard.
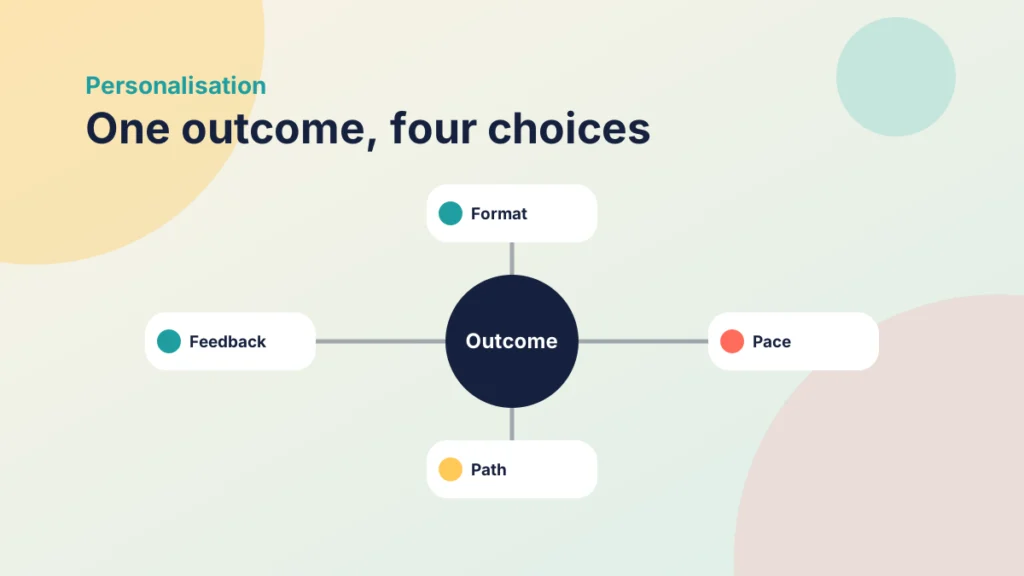
It is not the same as learning styles. The idea that students learn better when teaching matches a preferred style has weak evidence behind it, and I would not build a course around it. Choices about topic, format and pace tend to be more useful, because students can make them knowing their own situation.
There is a motivational reason for this too. Researchers who study motivation, such as in self-determination theory, describe autonomy, competence and a sense of connection as things that help people keep going. Choice supports the first, a suitable level of challenge supports the second, and the tactics below can support all three. I am summarising the idea here, so look at the original sources if you want to rely on it.
This builds on ideas in The Engagement Cycle and How to Use It, where students stay motivated when they feel some control. It also sits within Prepare, the first step of the PANDA framework, because you learn who is in the room before you teach them.
Four tactics worth trying
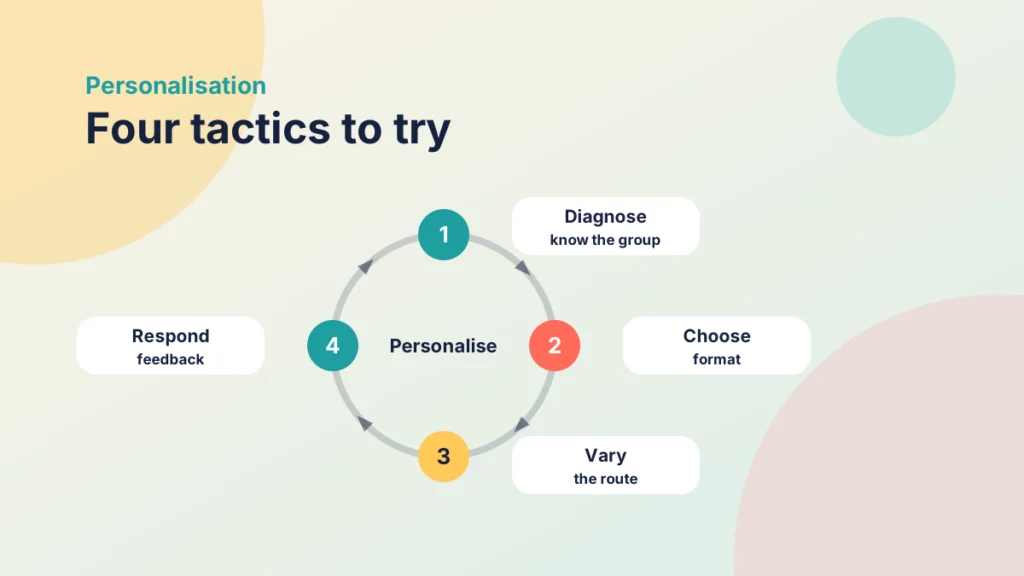
1. Start with a diagnostic
A short, ungraded check at the start of a unit shows what students already know, so you can decide where to put your time. Keep it to five or six questions. An opening task such as those in 5 Effective Icebreaker Ideas and Tips can also give you useful information about your group.
2. Offer a choice of format
Let students show the same learning in more than one way, such as a written report, a recorded explanation or a visual summary. Use one rubric for every format. This is the easiest tactic to start with, because it changes the output and not the content.
3. Vary the path
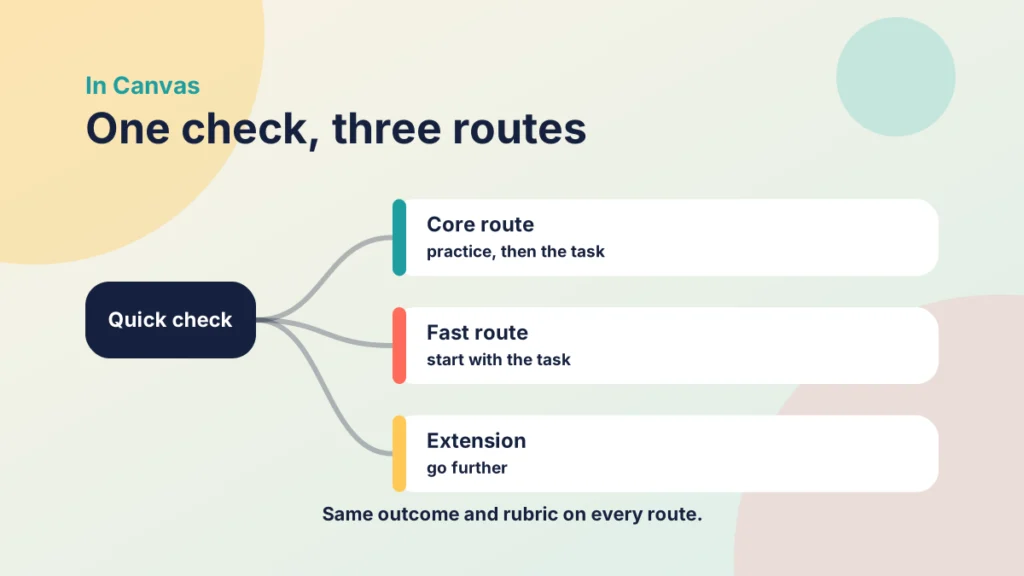
After a diagnostic, offer a core route and a faster route. Students who already know the basics can move on, and others get more practice. Start with one unit, because two routes mean twice the content to write and maintain.
4. Personalise feedback
Feedback is where personalisation matters most, and it need not take long. Reuse saved next-step comments and add one detail from each student’s own work. Creating Meaningful Feedback shows how to structure comments so that they are specific and usable.
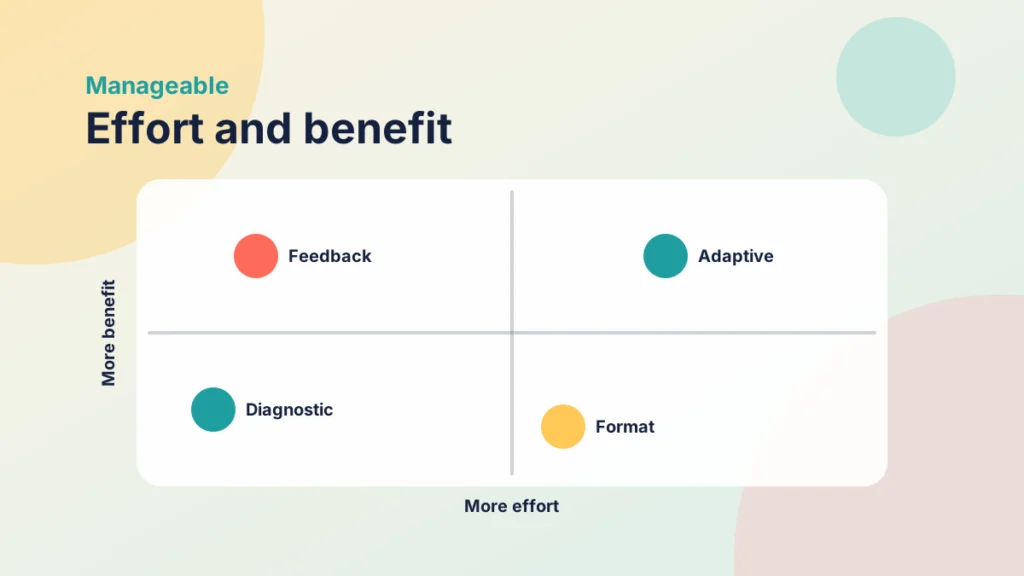
You do not need all four at once. Choose by effort and benefit. A diagnostic and a choice of format take the least effort and show results quickly. An adaptive route takes the most, because you must write and maintain more content. Feedback sits in between, and it is where reusable material pays off most.
Put it into practice
Your turn
Choose one of the four tactics and write a one-sentence plan for a unit you teach. Name the outcome, the choice you will offer and the standard that stays the same.
Students can also set their own goals. A short note at the start of a unit, such as one thing they want to be able to do by the end, gives them a reason to choose between options. Ask them to return to it at the end with one sentence on how far they got. It takes a few minutes and often tells you more than a satisfaction score.
Case study
A unit with two routes
Illustrative example
The context
A lecturer teaches a second-year module in which students arrive with very different backgrounds.
The challenge
Some students found the opening weeks too slow, while others were struggling to keep up.
What they did
The lecturer added a short ungraded quiz at the start of the unit. Students who scored well could start with an application task, while others began with a short set of practice activities. Everyone finished with the same assessment and the same rubric.
What happened
Students stayed in the unit, and the lecturer could focus support on those who needed it.
What would you do?
- What would you put in the quick check?
- How would you keep the two routes equal in standard?
Try it yourself
What would you do?
Work through three decisions in a personalised unit. Each choice has a consequence.
Keep personalisation manageable
The risk with personalisation is workload. Every extra route has to be written, tested and kept up to date. These habits keep it under control.
- Build one core, personalise the edges. Keep a shared core of content and personalise a small part of it.
- Limit the routes. Two or three routes are usually enough.
- Reuse what you write. A bank of comments, prompts and templates serves every student.
- Keep the standard fixed. One rubric for all routes keeps the assessment fair. See How to Use a Rubric in SpeedGrader for how to apply it.
- Review after one run. Look at which routes students chose, and cut anything unused.
Be open with students about how routes are chosen. If a quiz decides a route, say so, and let students move to the other route if they wish. A route should feel like an offer and not a label. Students who start on the core route should be able to ask for the extension later.
Check the fairness of each route as well. Ask whether a student on the faster route misses something that the others get, and whether a student on the core route is held back without reason.
Personalise in Canvas
Canvas gives you a few simple ways to build routes without extra tools. Which of them you see depends on your institution’s settings, so check what is switched on.
Put it into practice
Try it in Canvas
- Create a short ungraded quiz or survey in Quizzes or Assignments to act as your diagnostic.
- If Mastery Paths is available, open the graded assignment or quiz and set the score ranges for each path.
- Add the content for each path as separate assignments or pages, then check the setup in Student View.
- Without Mastery Paths, use Modules with prerequisites and requirements to guide students from one step to the next.
- For choice of format, open an assignment and tick more than one option under Online Entry Options.
Whichever tools you use, test the routes as a student would. Check that each path leads somewhere, that no student can get stuck, and that the instructions make sense without you in the room. It is worth asking a colleague to try it too, because they will click where you did not expect.
If your pages are cluttered, Refreshing Old Canvas Pages Without Rebuilding Them can help you tidy them before you add routes.
Put it into practice
Your turn
After your first run, list which routes students used and which they ignored. Decide what to keep, change or cut before the next run.
Try it yourself
Plan a route
Move the slider to try different diagnostic scores and see which route you might offer.
Check your understanding
Knowledge check
What stays fixed when you personalise a unit?
The learning outcome and the standard.
Why are learning styles a weak basis for personalisation?
The evidence for matching teaching to a preferred style is weak.
What does a diagnostic tell you?
What students already know, so you can decide where to focus.
How can you keep the workload manageable?
Build one core, personalise the edges and limit the number of routes.
Remember
Key takeaways
- Personalisation means choices about what, how and when, with one outcome and one standard.
- Learning styles are a weak basis, and choice and prior knowledge are stronger.
- Start with a diagnostic or a choice of format, because both are cheap to run.
- Reuse comments, prompts and templates to keep the workload down.
- Review after one run and cut what is not used.
Your next step
This week, add a five-question ungraded diagnostic to the start of one unit. Look at the results, and decide whether any students would benefit from a faster route or extra practice. Afterwards, note what you would change before the next run.
Reflect: which part of your course would change most if you knew what each student already knew?