The PANDA framework breaks weekly online content into five predictable elements: Prepare, Activate, Navigate, Demonstrate and Articulate. Many people grasp the first two and the last two quickly, but the middle letter is where course design most often goes wrong. This post looks closely at the N, Navigate, and how to build it well in a virtual learning environment such as Canvas.
Where Navigate sits in PANDA
Each week follows the same rhythm. Prepare sets expectations and outcomes. Activate gets students thinking and engaged. Navigate is where they work through the main content. Demonstrate gives them a chance to show what they have learned, and Articulate invites them to reflect on it and share their thinking.
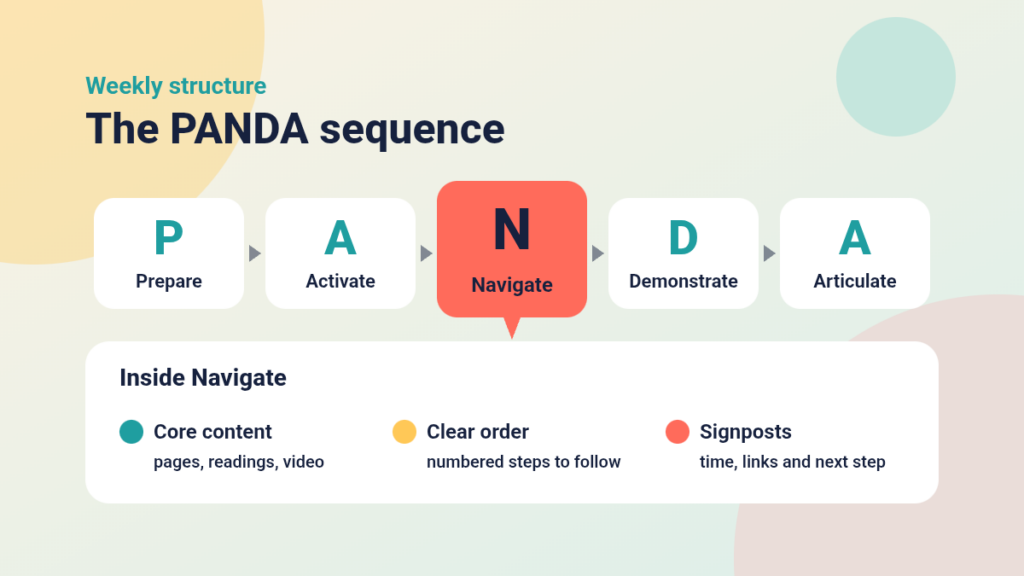
Because Navigate sits between motivation and evidence of learning, it carries the substance of the week. It is also the element most at risk of becoming a content dump. If Prepare and Activate have done their job, students arrive here curious and clear about the week’s outcomes, so the content should repay that attention with a route that is easy to follow.
What Navigate is for
The word matters. Navigating implies a route, and a route needs a clear start, a sensible order and a destination. Navigate should guide students through the core content rather than simply list everything you want them to see. A student who opens this element should know what to look at first, how long it should take and what to do next.
Four design principles for Navigate
1. Chunk and sequence
Break the content into short, ordered steps. Each step should have one purpose, such as watching a short video, reading a section or trying a worked example. Numbered steps help students keep their place, and they make it easier for you to spot gaps.
2. Signpost every step
Tell students what each item is and why it matters. A brief line such as “Read this first to understand the terminology before the video” gives context and saves them from guessing. Add an approximate time where you can, based on your own estimate, so that students can plan their study.
3. Use media with purpose
Choose the format that best fits each idea. A short video can show a process, a page can summarise key points, and a reading can offer depth. Avoid adding formats just for variety, because every extra item is something a student has to find, open and process.
4. Manage the load
If a week contains more than students can reasonably work through, say what is essential and what is optional. Clear labels for core and extension material let learners prioritise, and they respect the fact that your students have other commitments.
Building Navigate in Canvas
Canvas gives you several tools that suit this element:
- Pages let you combine instructions, short explanations and embedded media in one place.
- Modules let you order items, add text headers and indent items so that the structure is visible at a glance.
- Module requirements can ask students to mark an item as done or view it, which gives them a sense of progress.
- Consistent naming across weeks, such as “Navigate: Week 3 content”, helps students find the element immediately.
A simple worked example
Imagine a week on interviewing techniques. A Navigate page might contain the following ordered steps:
- Read a one-page overview of the main interview types.
- Watch a short video demonstrating one technique.
- Read the assigned chapter, with a note on the sections that matter most.
- Complete a short practice task to check understanding before moving on.
Every step is labelled, ordered and linked to the week’s outcomes, so the route is obvious.
Common mistakes to avoid
- Listing a long set of readings with no guidance on priority.
- Scattering content across several places so that students must hunt for it.
- Leaving out instructions because they seem obvious to you.
- Changing the layout from week to week, which forces students to relearn how to find things.
Check your Navigate element
Before publishing, open the course in Student View and work through the element as a student would. Ask whether the order is clear, whether every link works and whether the total workload looks reasonable. Check that videos have captions and that images have alt text so that every student can follow the route. A colleague who does not know the subject can be a useful tester, because they will notice anything that is unclear.
Where to go next
A well-built Navigate element prepares students for Demonstrate, where they apply what they have learned. When the route is clear, they arrive ready to do exactly that.
Keep going

One Page vs Pre-In-Post vs PANDA: Choosing a Structure for Your Canvas Week
A one-page week, Pre-In-Post and PANDA each shape how students meet your content. This post compares their strengths and limits and shows how to choose and move between them in Canvas.
Introduction to the PANDA Framework
PANDA gives every week of an online course the same five-part structure: Prepare, Activate, Navigate, Demonstrate and Articulate. Here is how it works and how to build it in Canvas.
Prepare: The Important First Step in the PANDA Framework
Prepare sets the scene for each week of an online course. Here is what to include, how to build it in Canvas and how to keep it short enough that students actually read it.